|
.. |
|
| The placed cuttings are rooting best in a greenhouse and then protected
for direct sunshine. When you haven't the disposal of a greenhouse, then place them out of
the sun for a window of the livingroom or from a empty standing sleepingroom. And a
place out of the sun outdoors is also possible, provided the out-door temperature then is
minimum 18°C. |
|
.. |
|
| Dertermining factors for good rooting are: |
| * heat and
special bottom heat is of influence on the rapidity of rooting. The cuttings are best
rooting by a bottomtemperature of about 24°C. By nurseries the bottomheat becomes
arranged via heating pipes under in the cuttingtables. A hobby-ist best can made use of
electrical mats, which are in business in various formats. Also they can heat the bottom
with a special heating cable, which is to obtain in various lengthes; |
| * getting
sufficient light, but they may not stand in direct sunlight; |
| * the quantity
of oxygen, that can become taken up via a well-aired cutting soil or other cutting medium; |
| * the taking up
of water, take care that the cuttings aren't standing too dry and also not too wet; |
| * the humidity
of the air in the environs of the cuttings: a low humidity, the cuttings cann't have,
while they haven't yet roots to transport water to the leaves (protect them with the
'roof' of a 'mini-greenhouse' or plastic folie; the ideal humidity of the air in the
cutting space is 80 ą 90%. |
 |
| Various phases from rooting till flowering are: |
| * from cutting
without roots till cutting with the first roots; |
| * a vegatation
growing period, that means there is growth in the cutting; |
| * a period of
harding, by with the cutting is to be able to resist differences in temperature, rain and
wind; |
| * forming the
top and afterthat the flowering. |
|
. |
|
Taking
off cuttings in a soil-mix with little food |
|
| Good cutting
soil exists out of 1 part
peat-litter mixed with 1 part perlite. Former here for was used peat-litter mixed with
sand, but this mix of soil sink down allready soon and then this cutting medium isn't
longer airy. For all there mayn't sit in the cutting soil fertilizers and this must be
sterile. In garden markets there are for sale today bags with good and sterile
cuttingsoil. |
| The treatment
for slipping of the cutting goes
as follows. About half a centimeter under the node cut the cutting right down (some
fuchsialovers cut down sloping, but the little piece of peel on the sloping end can easely
lead to come into existence of botrytis). By a cutting of the growing tip remove of this
node the leaves. Remove possible flower buttons. Dip the end of the cutting about 1 cm in
growing powder and after that to much of the powder - that puts a brake the forming of
roots - flick well. |
| We place the
cutting in a little pot. But
when you have 60 ą 70 cuttings then it is better to place them in a 'mini-greenhouse' or
a PS-tray; just the PS-tray is efficient for placing autumn cuttings while they must
remain standing in it till end Februari. We fill the little pot or the tray with
cuttingsoil, but don't press it! After that we prick with a pencil a little whole of 2 cm
deep and we stick in it the cutting. After placing the cutting the soil may not press
also, we pour water to the cutting by the free space around the little whole fill up
with cuttingsoil. Now spout the whole with a mouldy preventing expedient (for example
Eupareen). We pour water by the cutting through wich the free space around the whole fill
with cuttingsoil. Are the cuttings standing in a greenhouse, where the humidity of
the air is minimum 80%, then is placing of plastic folie/roofing over it not necessary,
but screen then well with a paper. In this way the chance on excisting of botrytis is more
little. The cuttings must well stand light, but not in the sun. Prevent the excisting of
botrytis by removing fallen little stalks and leaves. When there is no bottomheat, then
the temperature in the cutting space must be 18 ą 20°C. With a bottomheat of about 24°C
the cuttings root much rapidely and there will grow out more cuttings. After three days we
hold the plastic folie/roofing or paper of the cuttings and we spray with a mouldy
preventing expedient. |
|
|
|
|
. |
|
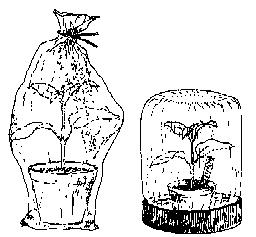
Mini-greenhouse
- The little pot with placed in it the cutting, and which is placed in
a 'mini-greenhouse' (button up plastic bag or on a screwlid in a turned upside down
marmalade pot). |
|
Mini-greenhouse
- In a transparant packing box from for example butter 6 or 10 cuttings can root
together. |
|
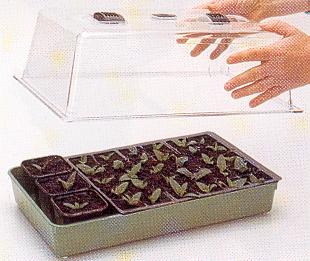
Mini-greenhouse
- In treatment are special mini-greenhouses where on a little surface about 25 ą 35
cuttings can root under a transparant plastic roofing with ventilation openings. |
|
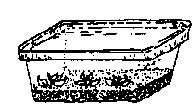
| The cuttings can also be placed in polystyreen tableaus with in
it 104 holes which are filled which cuttingsoil. The tableaus are standing free about 2 mm
from the underground, this for to get a good circulation of air. Slipping in such tableaux
can only in spring, while they may stand in it maximum 4 weeks and so then must be rooted
before the potting. |
|
| The moment of
potting after forming roots is
dependent on the temperature in the cutting space and if there becomes slipped on
bottomheat (they can have allready after 14 days roots). Are the roots still very little,
then wait still one week. By the repotting we take care that there remain sitting
cuttingsoil as much as possible. We fill a little pot with diameter 6 ą 8 cm with a good
potting soil, but don't press it, make in it a little whole of the size of the clod of
soil wath is hanging to the cutting and place in it the cutting carefully. Pour
afterthat and also now don't press. Take care that the potsoil doesn't dry out or is too
wet. Pay also attention to the forming of moulds. Take to that care for a good circulation
of air (for example with a fan). Remove fallen leaves. The first three days after the
repotting we hold the plants still out of the sun, but afterthat we place them as sunny as
possible. This for to prevent that the internodiėn become to long. After about 4 till 6
weeks we give fertilizer. |
|
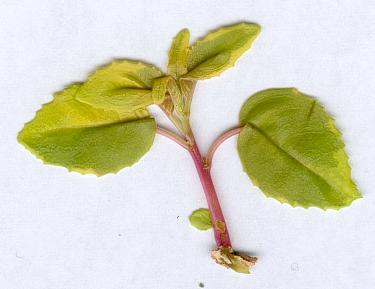
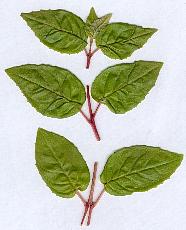
| The forming of
the growing up rooted cutting goes
as follows. After the first three pairs of leaves top the cuttings. To get a bush plant
top again and again after two pairs of leaves. With this we go on till end April/half May.
When we want to make of the cutting a standard we don't top before the cutting is grown
out till the wished hight. Well we hold away side branches, but well let sit the leaves
around the stem. That are namely the 'sap drawers' , who take care for that a solid
(thick) stem come into existence. |